Exploring Android 12: Splash Screen

Android 12 introduces new Splash Screen API that provides easy-to-use and consistent way to display a splash screen when user is launching your application.
In this article, we will create a simple Android application that implements this API. The next section will summarize what this new API is capable of. But you can skip this part and go directly to the step-by-step explanation if you want.
tl;dr
There are a number of things you can do with Android 12’s Splash Screen API:
- You can use between 2 splash screen themes:
Theme.SplashScreenandTheme.SplashScreen.IconBackground. WithTheme.SplashScreen, you can customize the splash screen’s background color and icon (and its duration if it’s animated). WithTheme.SplashScreen.IconBackground, you can customize the same properties as the first theme but with addition of the icon’s background color. - You can’t customize the splash screen enter animation, but you can customize its exit animation with
setOnExitAnimationListener. - You can keep the splash screen on-screen as long as you want with
ViewTreeObserver.OnPreDrawListener. - You can keep the splash screen on-screen indefinitely with
setKeepOnScreenCondition.
Here’s the Splash Screen in action:

Where’s the Source Code?
Step-by-Step Explanation
Follow the steps provided below to make this application.
1. Open Android Studio. Create new project with “Empty Activity” option.
2. Open app/build.gradle file and add the new Splash Screen library:
3. First, we will prepare our icon first. Create a new XML file in res/drawable folder named animated_face.xml. Copy paste the content of this file as follow:
This XML file is an animated drawable vector file that will change the fill color of a face icon from purple to white.
4. Next, we need to create our splash screen. Open values/themes.xml and create a new theme named Theme.App.Starting like this:
Notice that property postSplashScreenTheme is the theme that will be used after splash screen finished animating. Adjust this value to your project’s theme.
5. Next, we need to edit ourAndroidManifest.xml file. Set the android:theme property of <application /> tag to the theme that you just created in the last step:
6. Lastly, open MainActivity.kt file and copy paste the code snippet below. Notice that you actually only need to call installSplashScreen() method inside onCreate to activate the splash screen. However, I included some codes that you can uncomment if you want to try out various features of this new API, such as customizing the exit animation.
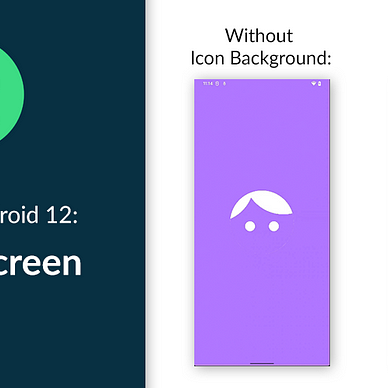
7. That’s it! Now you can run your app and see the splash screen. Notice however that the SPLASH SCREEN WILL NOT APPEAR CORRECTLY IF YOU’RE RUNNING DIRECTLY FROM ANDROID STUDIO. You need to close the app and open it manually for it to appear correctly. Here is what the splash screen should look like at the end:
8. (Bonus) You can add a background color for your icon by extending Theme.SplashScreen.IconBackground instead of Theme.SplashScreen. In your values/themes.xml file, add this new theme:
Apply this Theme.App.Starting.IconBackground in your AndroidManifest.xml file and you should get a new splash screen that looks like this:
9. (More bonus) If you uncomment the useCustomExitAnimation() method in the MainActivity.kt file, you will see a custom bouncing animation when splash screen is exiting the window like this:
BounceInterpolator so it bounces around!That’s it for the new Android 12’s Splash Screen API!
Thanks for reading!
—
Want to learn more about Android 12?
Check out all of our articles from “Exploring Android 12” series here: